How to use Inclined Flat Finishing in PowerMill
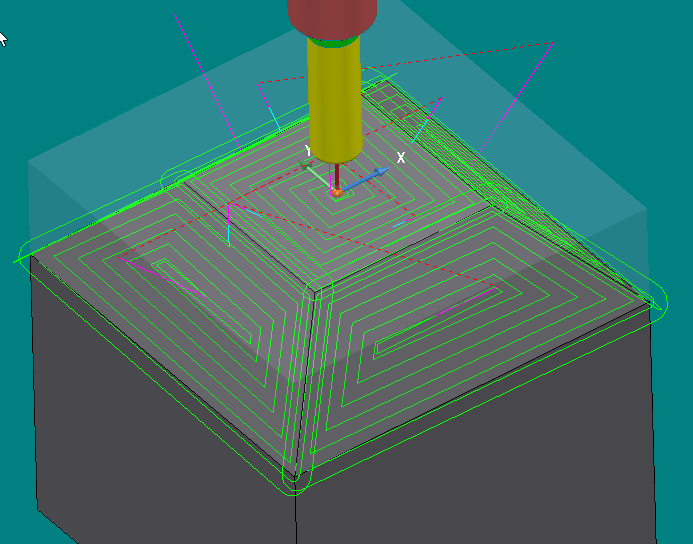
This strategy automatically detects flat areas in all orientations, within a user-defined angular range. The flat surfaces are then machined with the tool normal to each surface. Only surfaces that are entirely flat are machined in this strategy.
Issue
Multi-axis flats require individual workplanes and toolpaths, this can take a long time to set up and build.
Answer
Create the toolpath
- Go to the Home tab > Create Toolpaths group > Toolpaths

- Click on the Finishing category > Inclined Flat Finishing
- Click OK
- Set your standard parameters. Block, clearance plane, Start/End Points etc.
Inclined flat finishing settings
- The Inclines Flat Finishing page is a standard settings page that can be related to many other main toolpath settings pages.
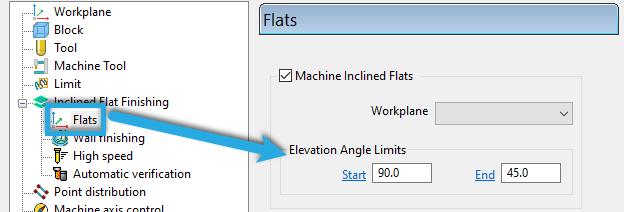
- In the settings tree > Flat - this form contains settings to machine inclined flat
- The Elevation Angle Limits, controls the range to look for flats.

- Machine Inclined Flats - Select to machine flat areas in all orientations. If deselected, only flat areas that are perpendicular to the tool orientation are machined.
- Workplane - Select a workplane from which the inclined flat angles are calculated from.
- Elevation Angle Limits - Lets you limit the toolpath within an angular range. Flat areas with an incline less than the Start angle and an incline higher than the End angle are not included in the toolpath calculation. The angles from 0 degrees to 90 degrees relate to inclined flats that have a positive draft angle, and the angles from 0 degrees to -90 degrees relate to inclined flats that have a negative draft angle.

![DSI-small-square.png]](https://know.dsi-mfg.com/hs-fs/hubfs/Logos/DSI%20Logos/DSI-small-square.png?height=50&name=DSI-small-square.png)