![DSI-small-square.png]](https://know.dsi-mfg.com/hs-fs/hubfs/Logos/DSI%20Logos/DSI-small-square.png?height=50&name=DSI-small-square.png)
Issue
Workflow improvement and automation to reduce repetitive steps.
Answer
Write a custom macro using the record function
-
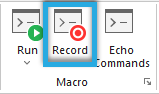
To create a PowerMill macro select Record from the Home tab - Home tab > Macro Group > Record
-
Specify the name and location of the macro
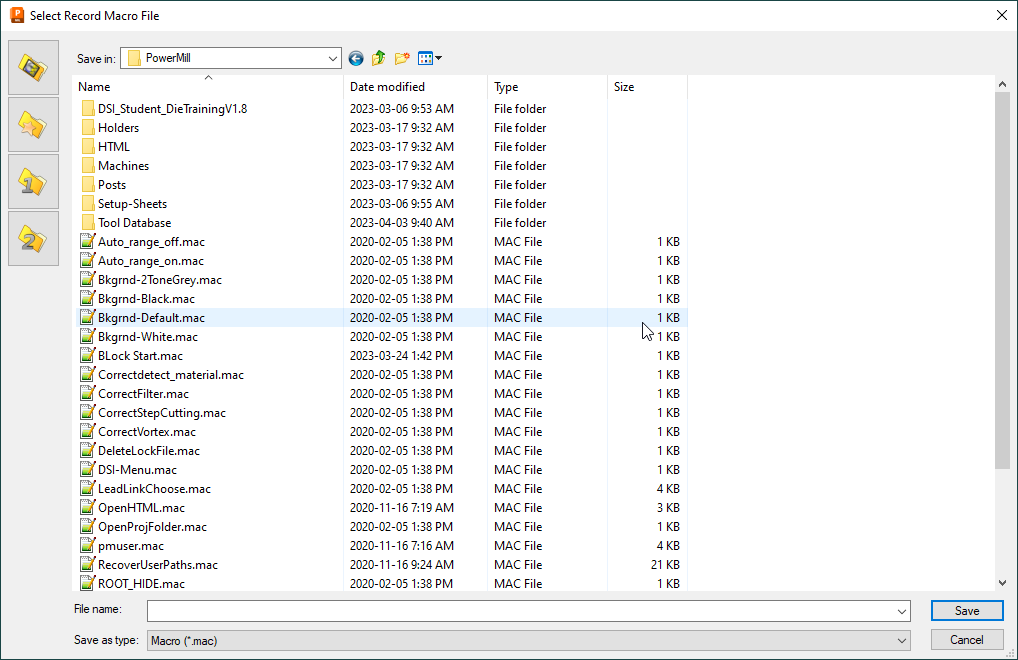
From this point forward all selections of the mouse will be recorded in the file.
-
Using button clicks, create your recorded workflow
-
Once completed, press Record again to save the macro
Add the macro to a custom ribbon tab
-
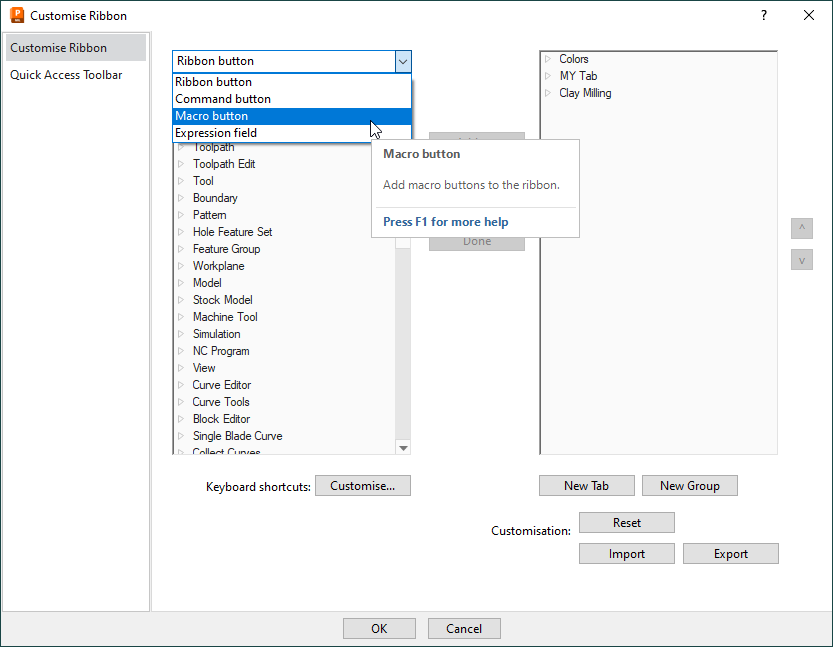
Right-click the empty space on the ribbon and select Customize the Ribbon...

-
Using the dropdown on the left side select the Macro button
-
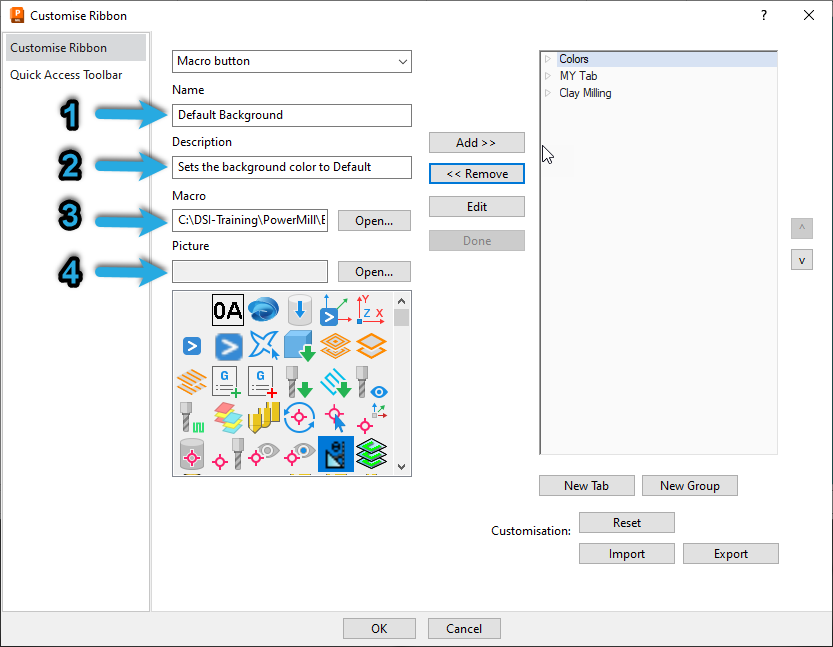
Input the following areas to define and specify the macro to use
-
Name - is what will show on the ribbon.
-
Description - will show when the tooltip is displayed for the macro button.
-
Macro - is the file just created that will run when the button is pushed.
-
Picture - is the image that will show on the ribbon picked from the list below
-
This can be created on your own as a .bmp .jpeg .jpg .png or .ico
-
You can also select an image created by Autodesk in the selection field below.
-
-
- Once the form is complete select the Add button
This will create a new Tab and a new Group. You can edit their names by selecting them from the list and pressing Edit.
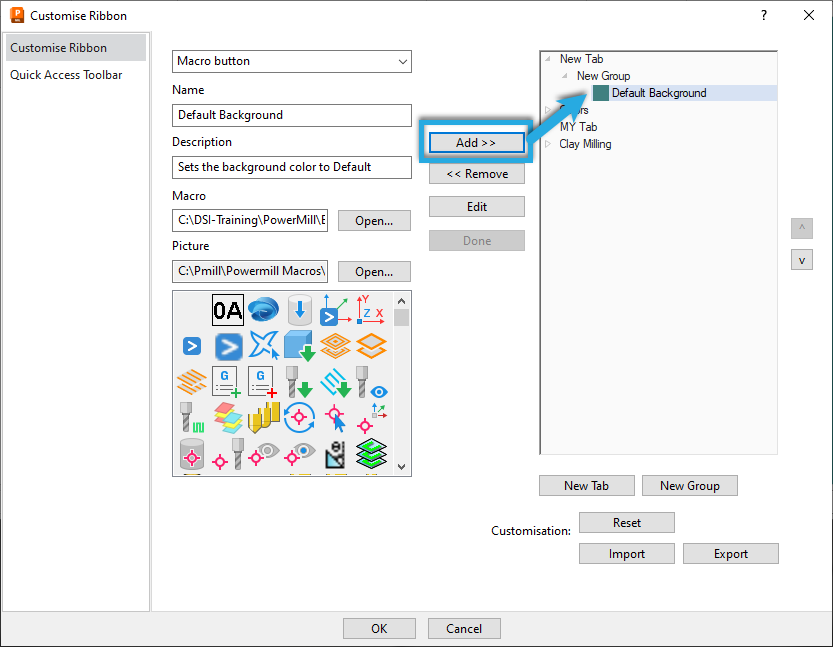
- Press OK to complete the new custom tab and macro button

Congratulations, you've made a macro!