![DSI-small-square.png]](https://know.dsi-mfg.com/hs-fs/hubfs/Logos/DSI%20Logos/DSI-small-square.png?height=50&name=DSI-small-square.png)
-
From the Hole Feature Set Toolbar > Create a Hole Feature Set

- Create a Vortex toolpath and input the appropriate parameters for the toolpath calculation.
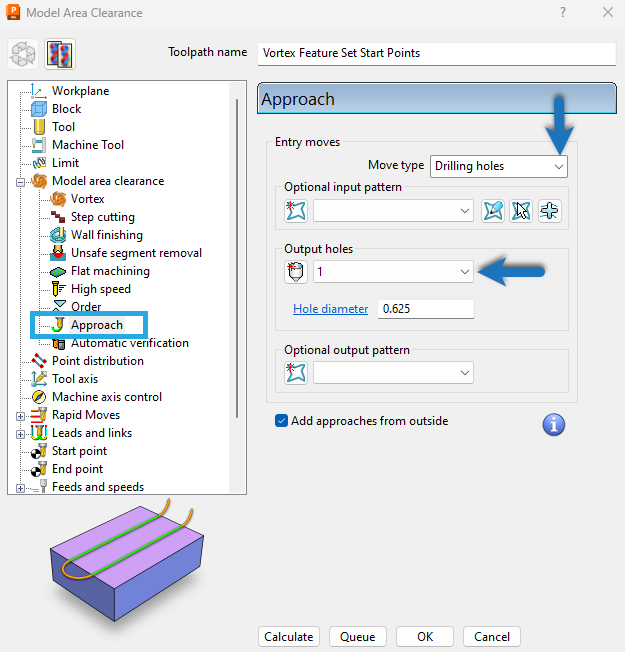
- In the toolpath settings tree > select Approach. Click on the Move type drop-down, and Choose Drilling holes. From the Output holes drop-down, choose your Feature Set to where you want the holes created. Calculate the toolpath.
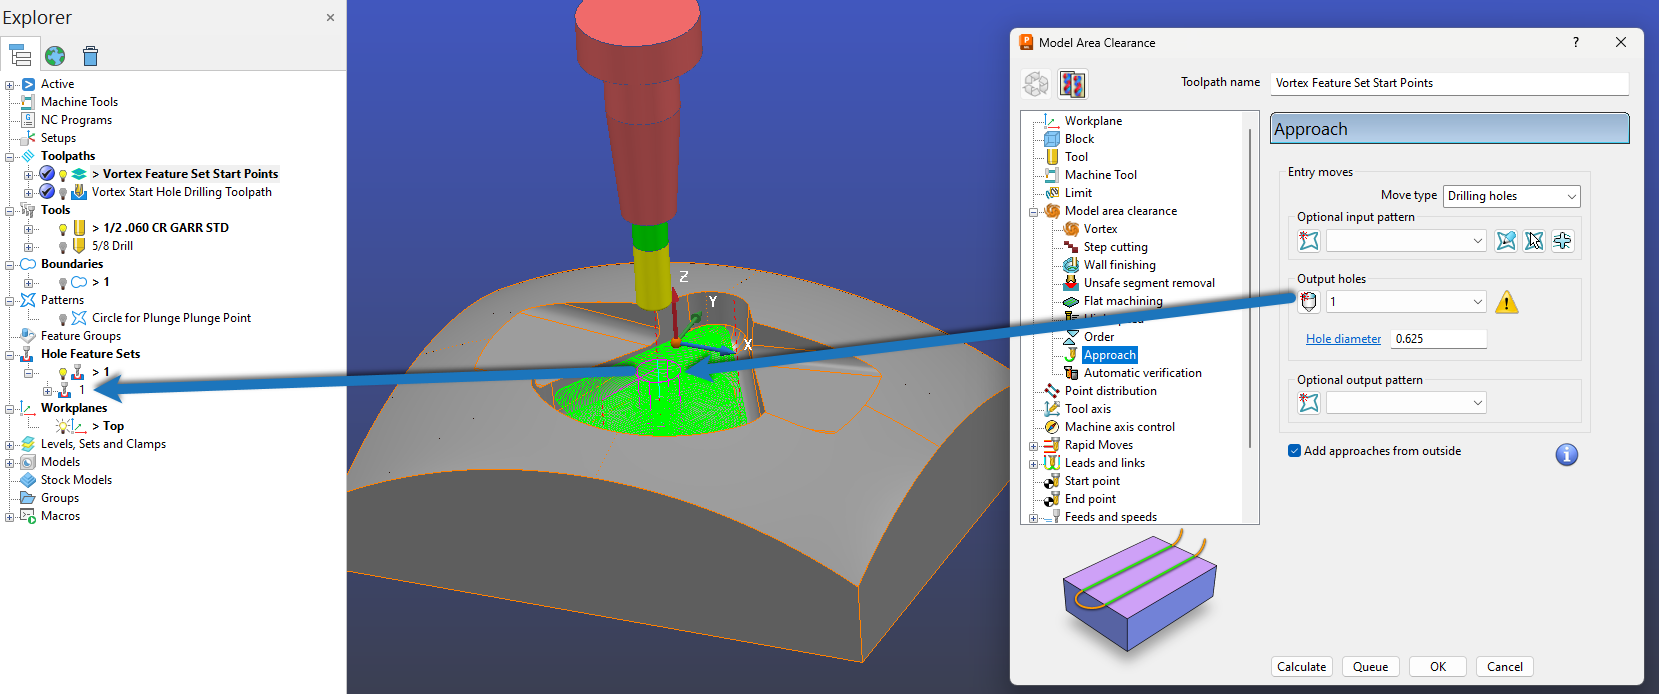
- The Feature Item will be automatically created in the selected Feature Set.
- Create a drilling toolpath using the Feature Set Item from the Vortex toolpath.
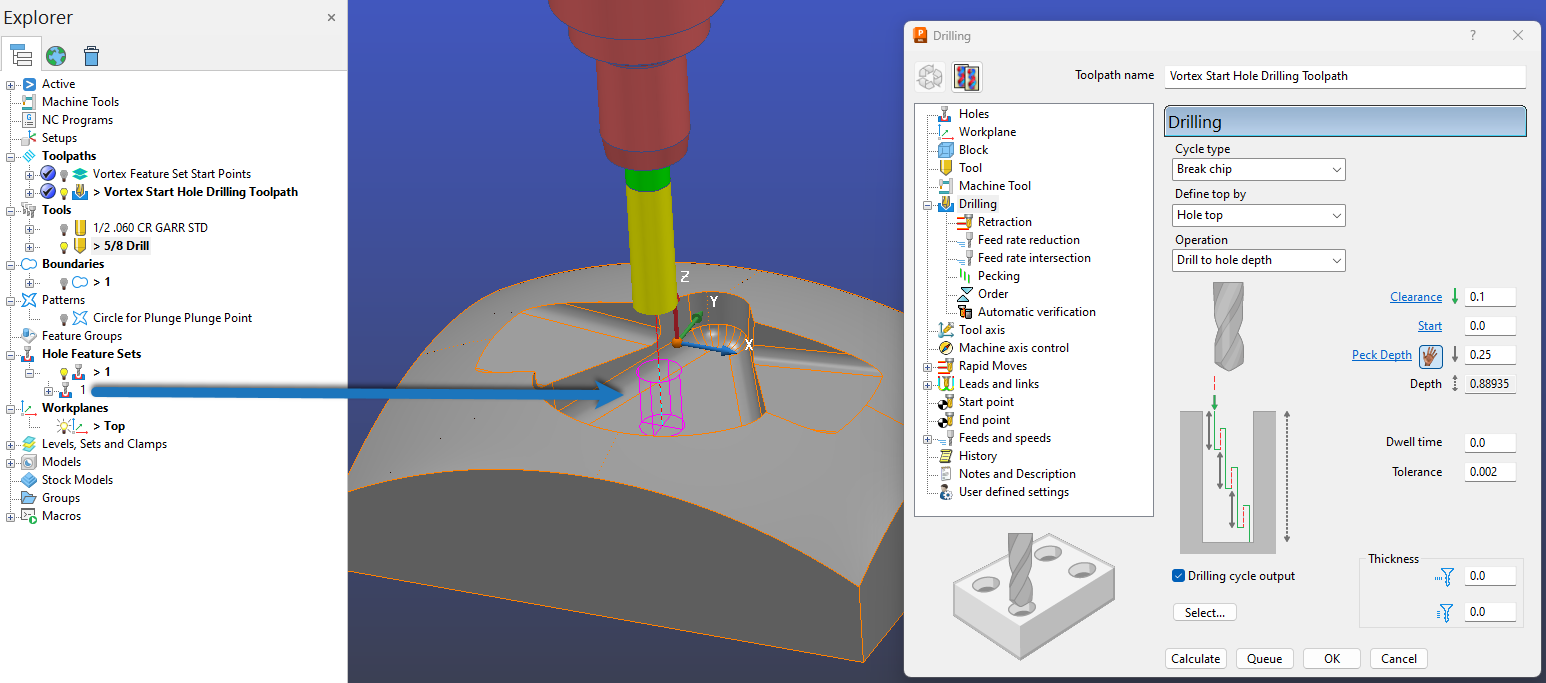
- Change the order of the toolpaths listed in the Explorer window by drag and drop to execute the start point drilling operation before the Vortex roughing toolpath.

Note: If you try to edit the hole position manually, the Vortex toolpath will change the position to where the plunge point is located. Therefore the toolpath strategy is deciding where the drilled hole needs to be located. The user cannot determine this with a pre-defined hole feature location. The toolpath will move the feature position of the selected item. Therefore it is essential to ensure all your toolpath parameters are correct before drilling the hole. Some instances of toolpath editing could move the original plunge point and update the hole position. This can be subtle, so it is recommended to drill a hole larger than the roughing tool diameter.